
Request access
Your TUM account cannot open the system until an administrator enables it. This is a one-time step.
- 1
Email the administrator
Write to Santiago Berrezueta at s.berrezueta@tum.de and ask to be added as a professor.
- 2
Include your TUM ID
Your ID is the short identifier you log in with at TUM — it looks like gx12abc. Without it your account cannot be matched and access cannot be granted.
- 3
Wait for confirmation
Once you are confirmed, you can sign in immediately with your normal TUM credentials. No separate password is created for this system.
Sign in
The same credentials work on the website and in the mobile app.
- 1
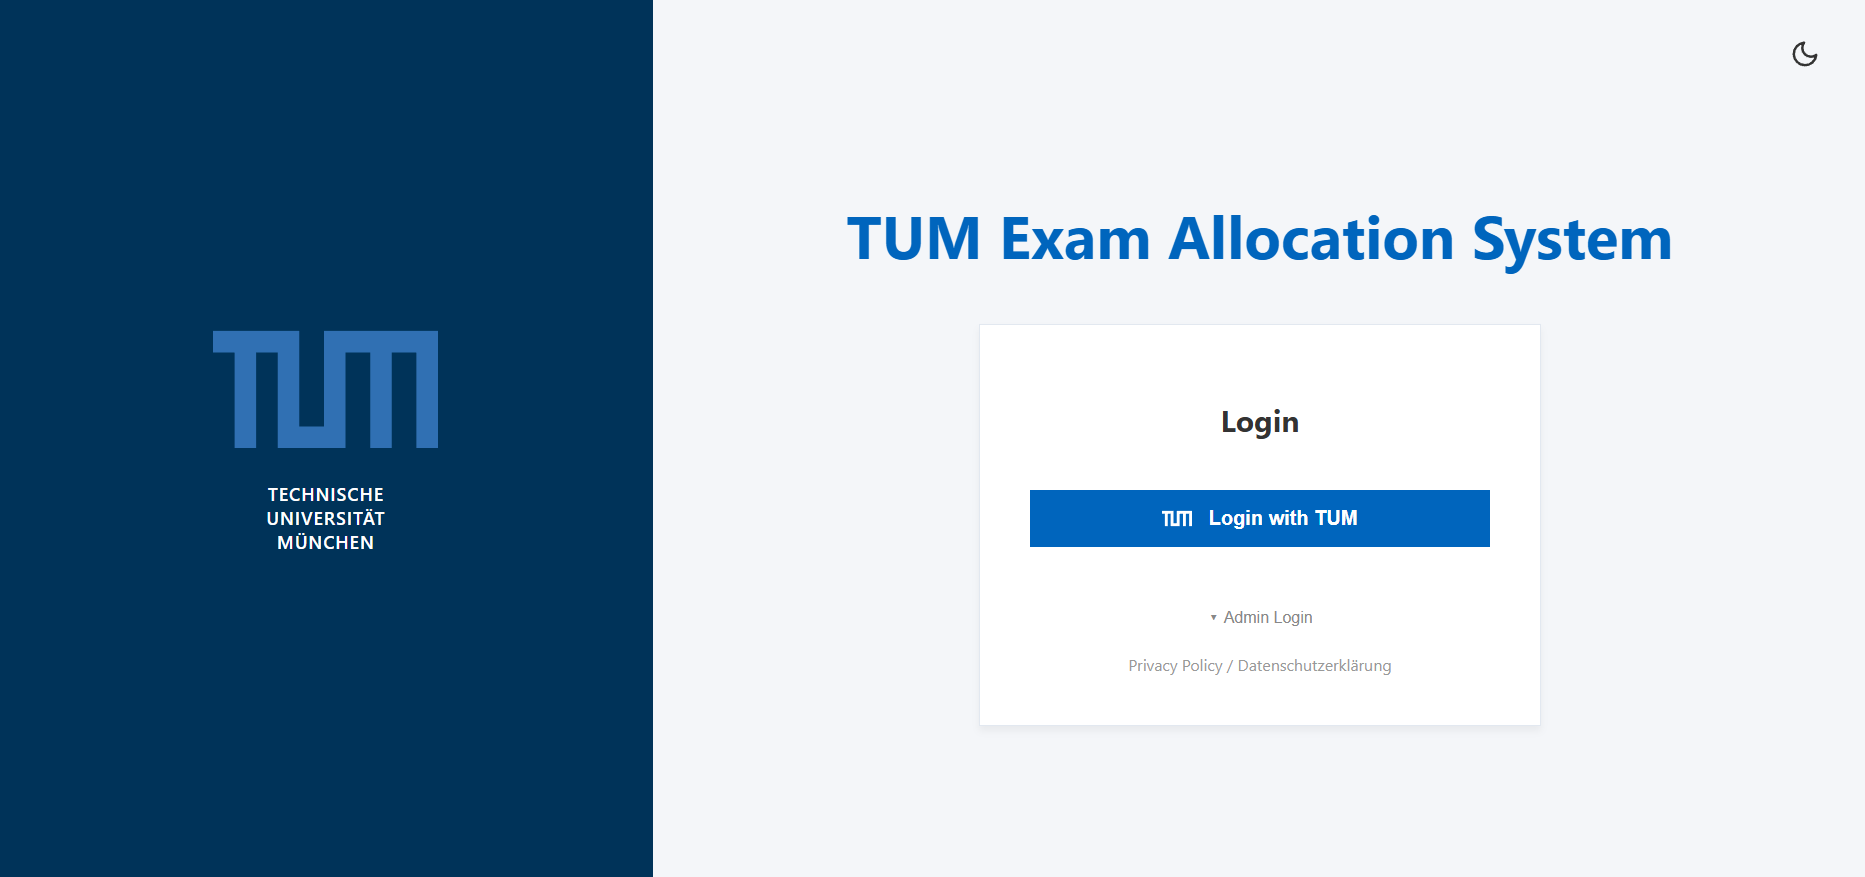
Open the website and choose Login with TUM
Press Login with TUM. You are forwarded to the usual TUM single sign-on page and back again once you authenticate.
- 2
You land on your exam list
You only ever see your own exams, plus any exam a colleague has explicitly shared with you.
Create an exam
Start by uploading the two participant files exported from TUMonline. The exam is built from them — you do not type the details in by hand.
- 1
Export the files from TUMonline
For your exam in TUMonline, export the participant list twice: once as CSV and once as PDF. The CSV holds the registration data, the PDF holds the participant photos.
- 2
Upload both files
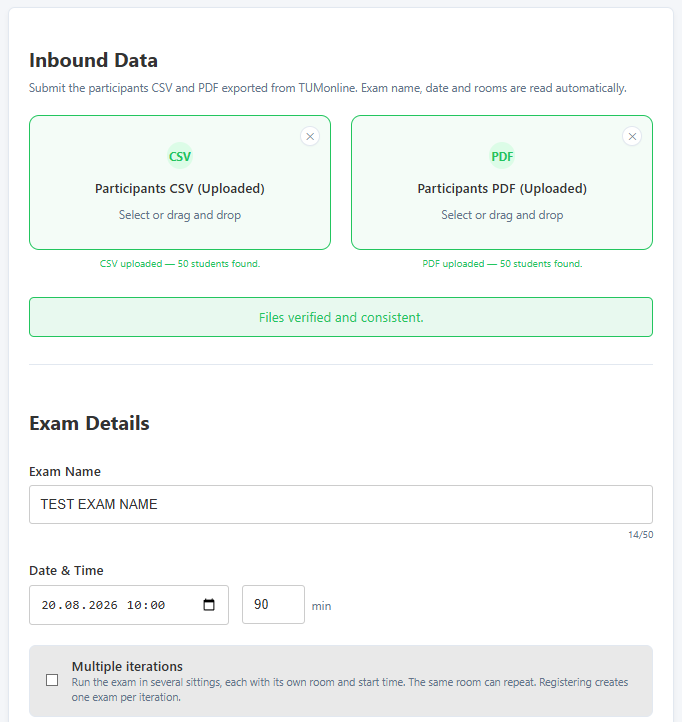
Drop them onto the Participants CSV and Participants PDF boxes, or click to browse. Both are required, and the system checks that they describe the same exam before you can continue.
- 3
Everything else is filled in for you
The exam name, date and time, and the rooms booked in TUMonline are read straight out of the CSV, along with each participant's registration number, study programme and attempt number. Photos are matched to participants from the PDF.
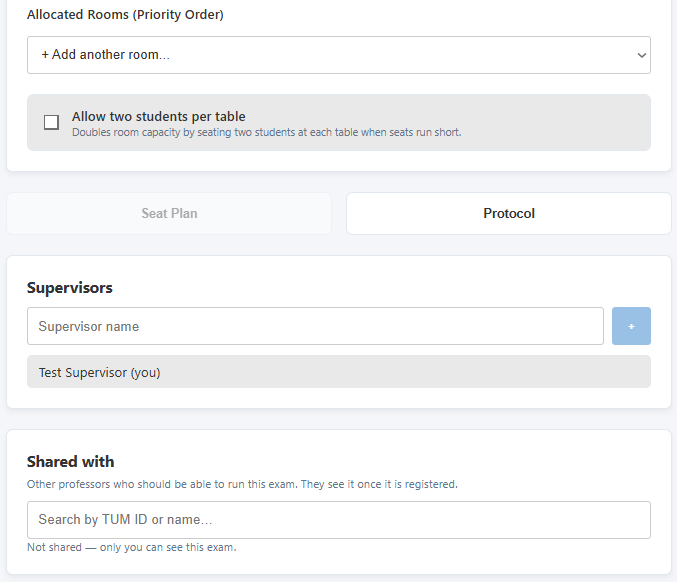
Review what was read and adjust only if needed — for example the duration, or an extra room. Enable Multiple iterations if the exam runs in several sittings; each sitting gets its own room and start time and becomes a separate exam once registered.
- 4
Add supervisors
List everyone who will invigilate. You are added automatically. Supervisors sign on the tablet during the exam and appear on the final report.
Generate the seat plan
Seats are assigned automatically so that the participants who most warrant attention end up where they are easiest to observe.
- 1
Press Seat Plan
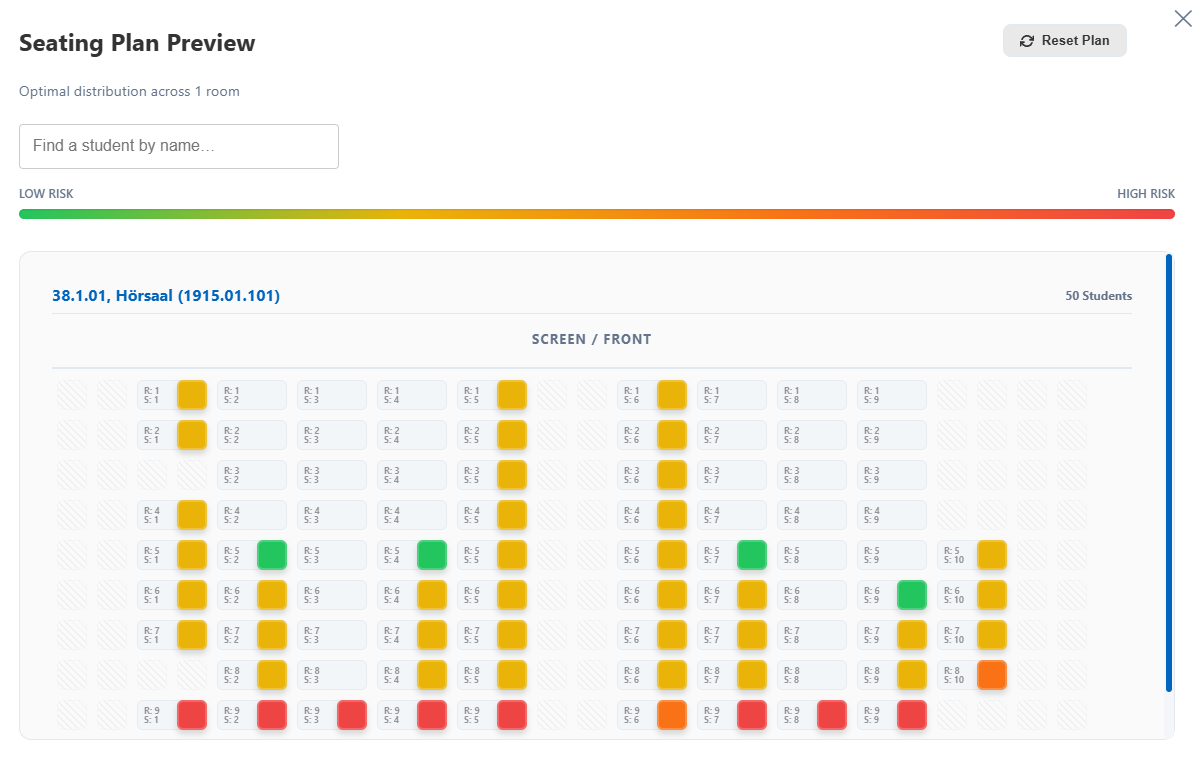
Seat Plan runs the allocation and opens a preview of the room with every participant placed.
- 2
How the placement is decided
Each participant is rated from their record: a previous cheating flag weighs heaviest, followed by the number of attempts at the exam. Seats are ranked by how easy they are to supervise — the back row first, then the places along the aisles, working inwards towards the middle of the room.
The highest-rated participants are placed in the best-observed seats. The colour of each seat in the preview reflects that rating, so the pattern is visible at a glance. Across several sittings, the earliest sitting is filled first, keeping the highest-rated participants under your own supervision.
- 3
Adjust it yourself
Search by name to locate someone in the room. Drag a participant onto another seat to move them; dropping onto an occupied seat swaps the two.
Register the exam
Registering publishes the exam so it appears in the mobile app. Do this once you are happy with the setup.
- 1
Press Register Exam
The exam moves out of draft state and becomes available on every device you are signed in on.
- 2
Multiple sittings split automatically
If you enabled iterations, registering creates one separate exam per sitting, each with its own room, time and seat plan.
Set up your tablet
The tablet app is what you use in the exam hall, for identity checks and signatures.
- 1
Install the app
Ask Santiago Berrezueta for the current build for your tablet (Android or iPadOS) and install it.
- 2
Log in with the same TUM credentials
There is no separate account. Sign in exactly as you do on the website.
- 3
Open your exam
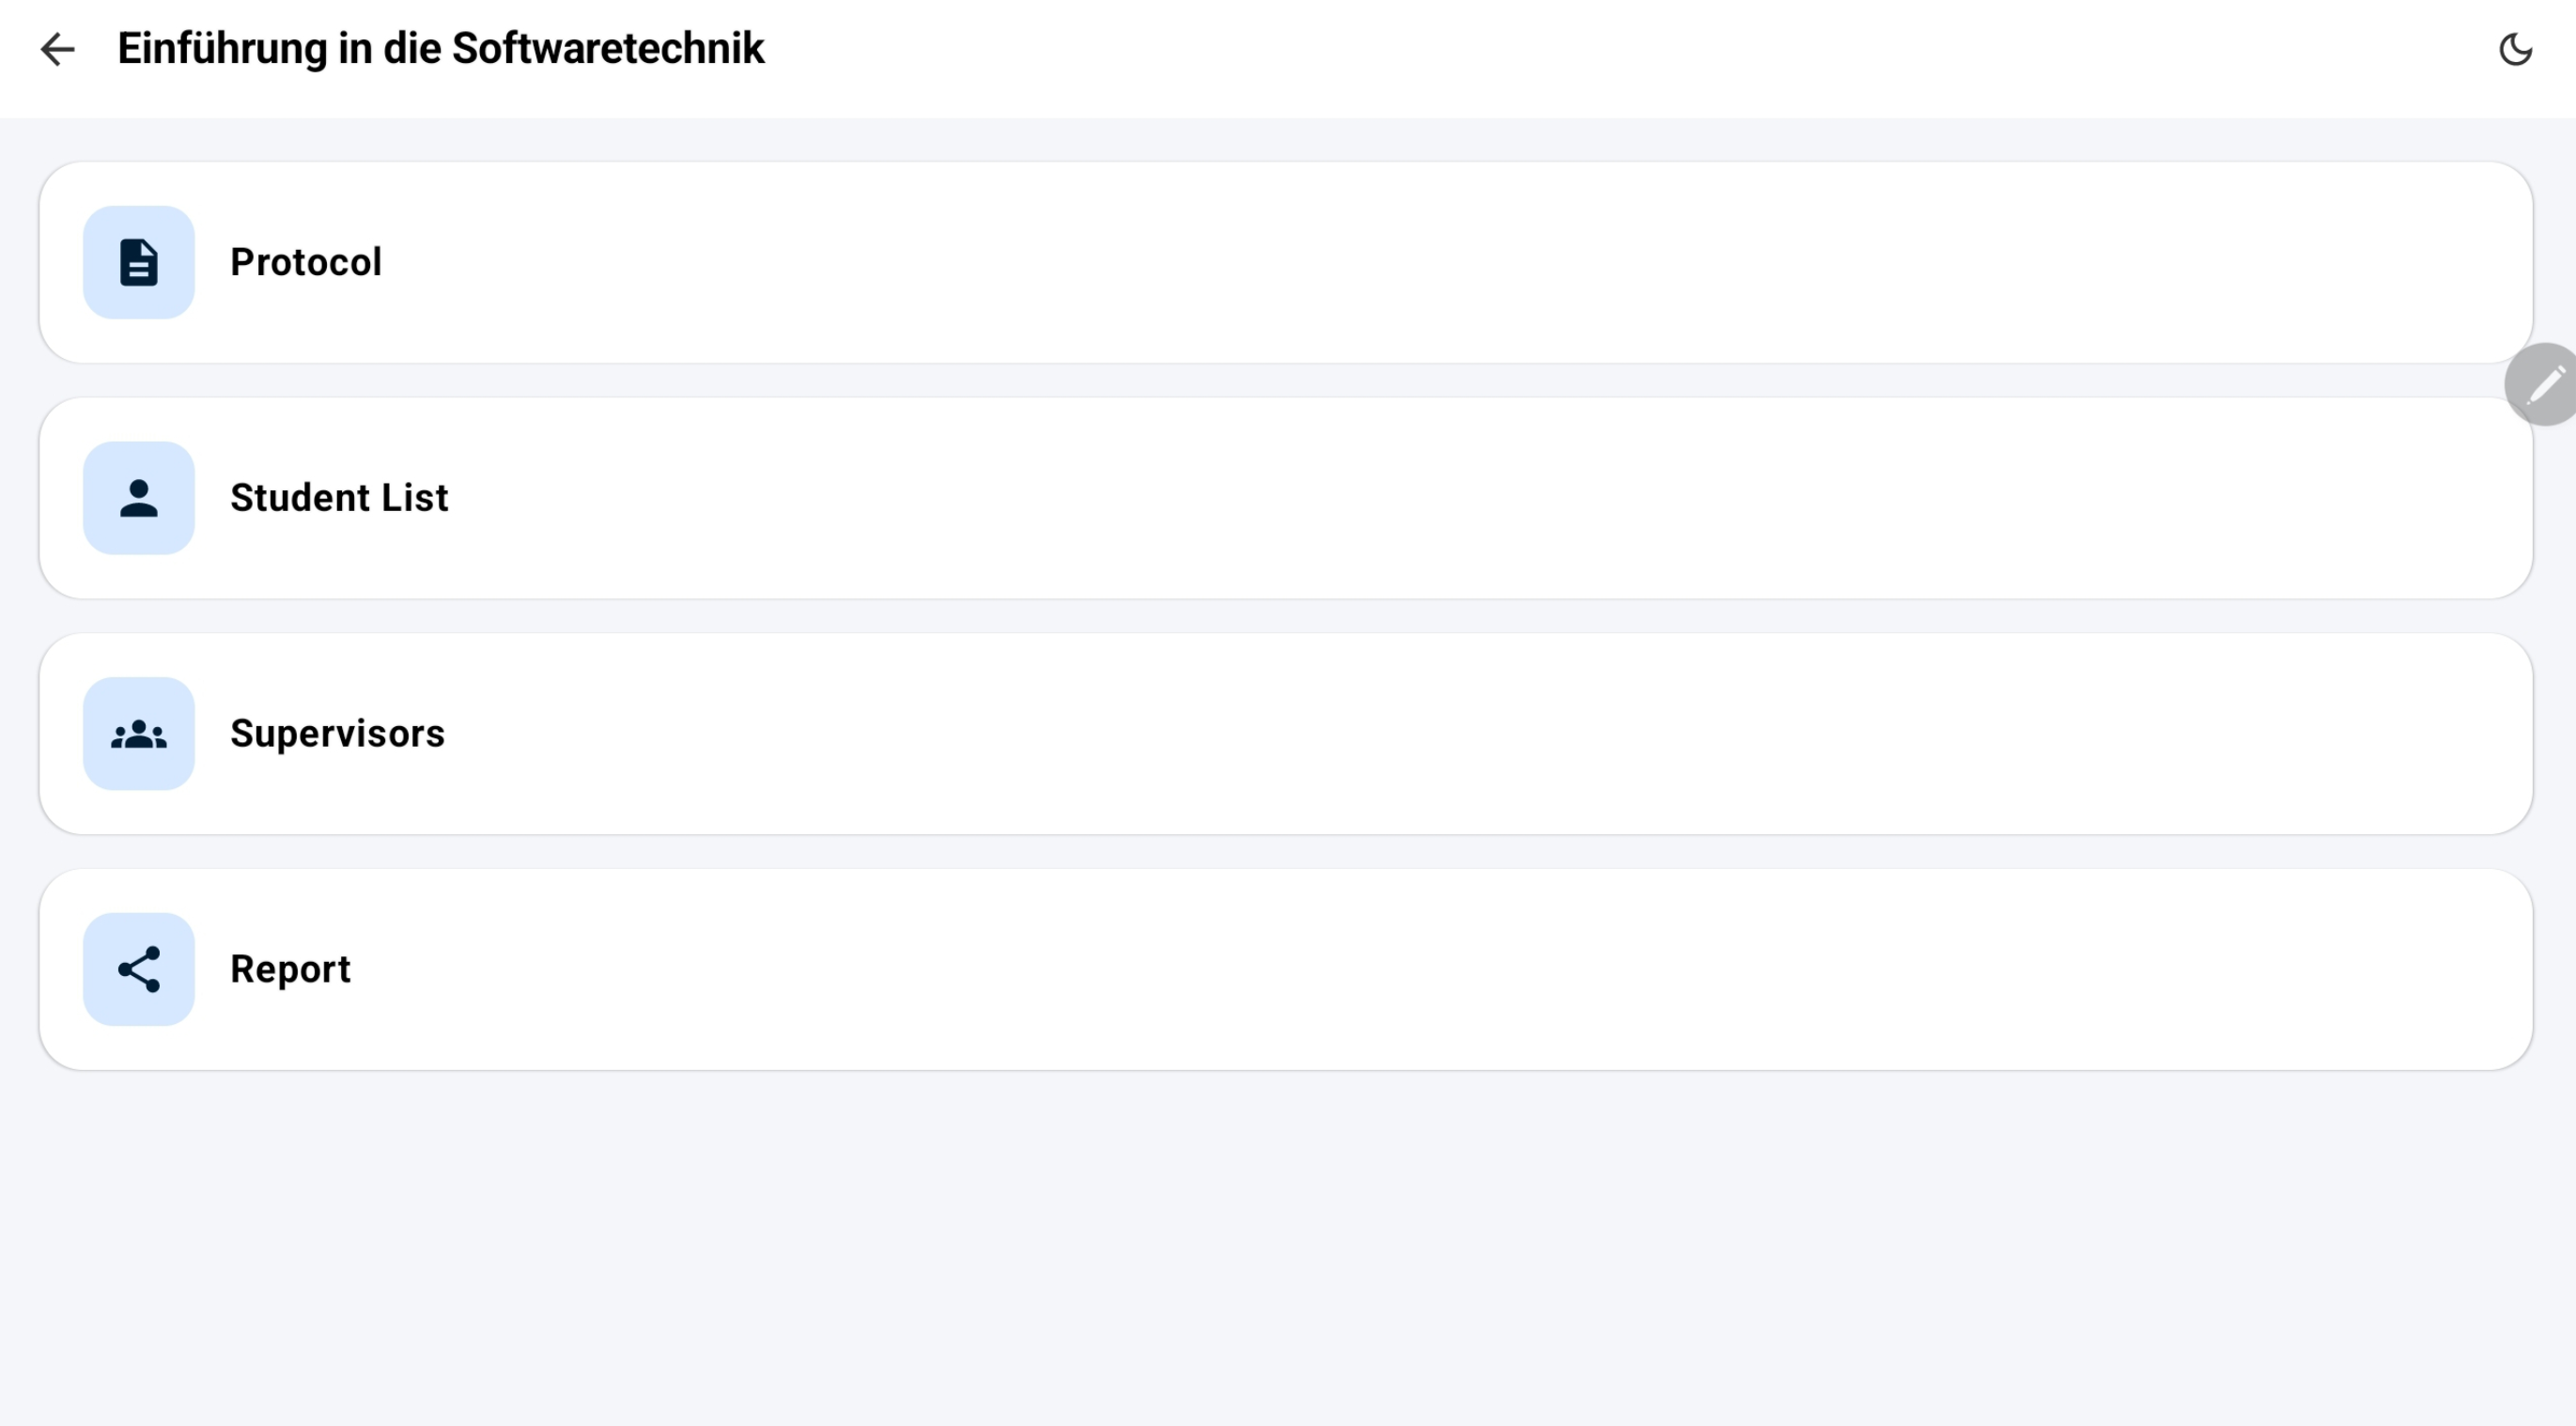
Registered exams appear in the list. Opening one gives you four actions:
Protocol
The announcement text to read out to the room before the exam starts.
Student List
Everyone sitting the exam, with photo, seat and signature status. A map view shows the same people on the room plan.
Supervisors
Add invigilators and collect their signatures.
Report
Export the finished report as a PDF and share or save it.
Collect signatures
During the exam, verify each participant's identity and record their signature as proof of attendance.
- 1
Find the participant
Search by name in the list, or open the map view and select their seat. The list can also be filtered to show only those who have not signed yet.
- 2
Verify identity
The participant's photo, registration number and assigned row and seat are shown together, so you can confirm the right person is in the right place.
- 3
Record the signature
Hand over the tablet, let the participant sign in the Sign here area, and save. Their status changes to Signed.
Participants who do not appear can be marked as not attended.
- 4
Record an irregularity
Suspected cheating can be reported against a participant. The flag is highlighted on the final report.

Export the documents
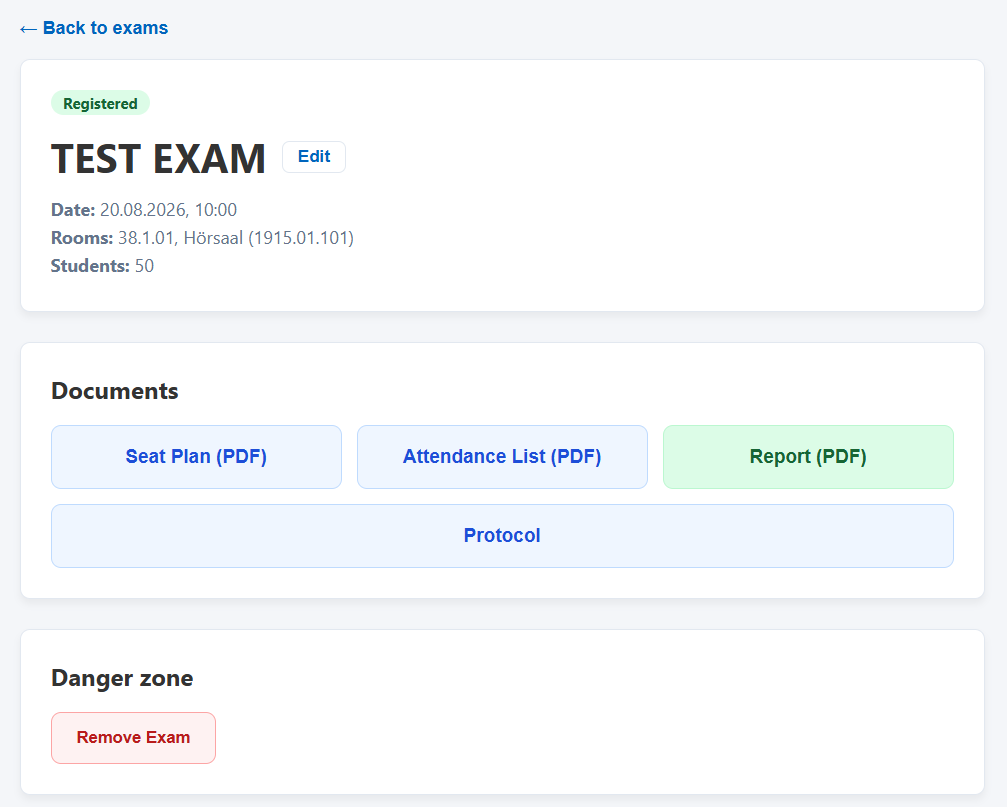
Three PDFs are generated on demand, always from the current data. Nothing needs to be prepared in advance.
Report (PDF)
The signed record: every participant with photo, seat, signature and any cheating flag, followed by a count of how many signatures were collected, and the supervisor signatures.
Seat Plan (PDF)
A wide-format room map showing who sits at which desk, sized to stay readable on a screen or a projector.
Attendance List (PDF)
A plain name, matriculation number and signature list for archiving.
- 1
From the website
Open the exam and use the Documents section. The file downloads to your computer.
- 2
From the tablet
Press Report. The PDF is handed to the tablet's share menu, so you can email it, save it to files, or open it in any PDF viewer.
Share an exam with a colleague
Useful when a second professor helps supervise, or needs the report afterwards.
- 1
Make sure they have access first
Colleagues only become searchable once they have been granted access to the system and have signed in with their own TUM ID at least once. If you cannot find someone, they have not completed step 1 of this guide yet.
- 2
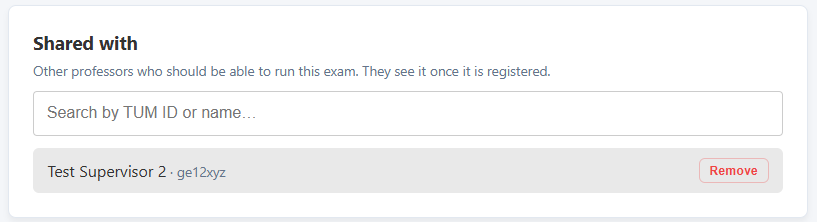
Add them under Shared with
While creating or editing the exam, search for your colleague by name or TUM ID in the Shared with box and select them.
- 3
They see it once you register
Shared exams stay private while they are drafts. After you register, the exam appears in your colleague's list on both web and tablet.
- 4
What they can and cannot do
They can collect signatures, manage supervisors, edit the protocol and export every document. Only you, as the owner, can delete the exam or change who it is shared with.
Still stuck?
For access problems, app installation, or anything that does not behave the way this guide describes, contact Santiago Berrezueta. Please mention your TUM ID and the name of the exam you were working on.
s.berrezueta@tum.de